Those of you that I have on facebook may have seen the pictures I posted from my visit to Manitoba. My Grandma and I learned to make GF perogies together! For those of you that didn't see... here it is. They were sooo good! I brought my pasta recipe to the table, and she brought her excellent Mennonite experience making perogies. A fine team we make I'll say!
This trip also lead to an interesting discovery. Recipes turn out differently in different environments. Huh. Maybe it was the water. Either way, they were still delicious, but I decided to test them out one more time at home before posting the recipe.
This one began at Food.com (I seem to find a lot there, or at least Google does). I only used the filling portion, and even then I only used it as a guide. I seem to be getting a little more daring with modifying recipes. For the dough, I used my pasta recipe (why have 6 different ways to make a pasta-like dough, when one will suffice?).
So here it is folks, gluten free perogies!
Gluten Free Cheddar Onion Perogies

Begin by whipping up a batch of that delicious pasta dough, and resist simply turning it into noodles and feasting on fresh pasta and butter. Trust me, the perogies are worth it. Divide the dough as usual, and then cover in plastic wrap and let rest until the filling is ready.
Filling Ingredients
- 2 large russet potatoes, peeled and cubed
- 2 Tbsp shredded onions
- 3 Tbsp butter
- 1 Tbsp ricotta cheese
- 1/4 cup heavy cream
- 1 cup cheddar cheese, shredded
- Salt and pepper, to taste
- Fresh or dried chives, to taste
Directions
- Boil and potatoes and onions together until soft. Drain the water.
- Add remaining ingredients and mash.
- Let cool until you can touch it.
- Roll out one section of dough until desired thickness.
- Spoon approximately 1 Tbsp of filling onto the dough near the edge of the sheet. Fold the pasta over so the filling is completely covered.
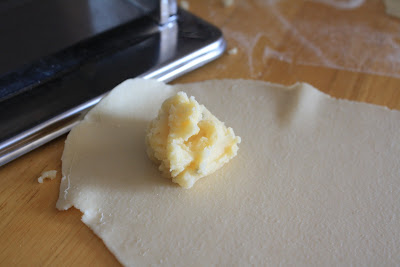
- Using a cookie cutter, or in my case a mason jar lid, (or whatever round tool you choose) cut the perogie out. Using a tool like this pinches the edges of the dough together, and achieves your perogie shape. I finished them off by pinching with my fingers also to ensure they were sealed.

- Repeat with remaining dough and filling.
- Don't discard that leftover dough from cutting perogies out! If you store it in a plastic ziploc while you are working, it won't dry out and can be re-rolled! I used all the scraps to roll out some noodles at the end! (See why I like to use my pasta recipe whenever possible?)

- Add to a pot of boiling salted water and cook for approximately 5-8 minutes. Serve with sauteed onions, bacon, sour cream, butter, etc... or whatever you are in the mood for!
- Feel free to try this recipe again, using a different filling recipe! The options are endless!


No comments:
Post a Comment